Abstract basics
If you are setting up a new design project or you are new to Abstract, this tutorial will help you to get started.
Getting started
What is Abstract?
Abstract is a design collaboration platform. It allows storing Sketch files and acts as version control for them. Abstract allows you to make changes to the Sketch files without losing the original file. If needed, you can always return to the original design.
Abstract also allows you to collaborate with other Helsinki designers and to share your designs with developers. You can also easily browse other Helsinki design projects for inspiration and examples.
How to download and install Abstract?
Abstract has both a desktop and a web app. If you are just viewing design files, you can use the web app. If you are a designer, you need to download the desktop app to edit Sketch files. You can download the app from the Abstract website download page. Note that you will need a Mac computer to use the Abstract desktop app.
Which Abstract role do you need?
Abstract has two (2) levels of access rights; Viewer and Contributor.
Users with the Viewer role can browse projects and their files and view detailed design specifications in the Inspect mode. Users with the Contributor role have the same features as the Viewer role does but also can create and edit Abstract projects.
As a rule of thumb, if you need to create or edit design files in Abstract, you need the Contributor role.
If you already are part of the City of Helsinki organization but missing the Contributor role, ask the city of Helsinki representative of your project to fill out the Abstract invite form for you (requires Helsinki AD credentials).
How to get invited to the City of Helsinki Abstract organisation?
Every City of Helsinki Abstract project is under an organisation. To access these projects, you need an invite.
First, you need to register to Abstract. You can do that on the Abstract sign up page. You may use any email address you like, for example, the email of your organisation.
After you have your account, you can get invited to the organisation. Ask the city of Helsinki representative of your project to fill out the Abstract invite form for you (requires Helsinki AD credentials).
Using Abstract
How to create a new project?
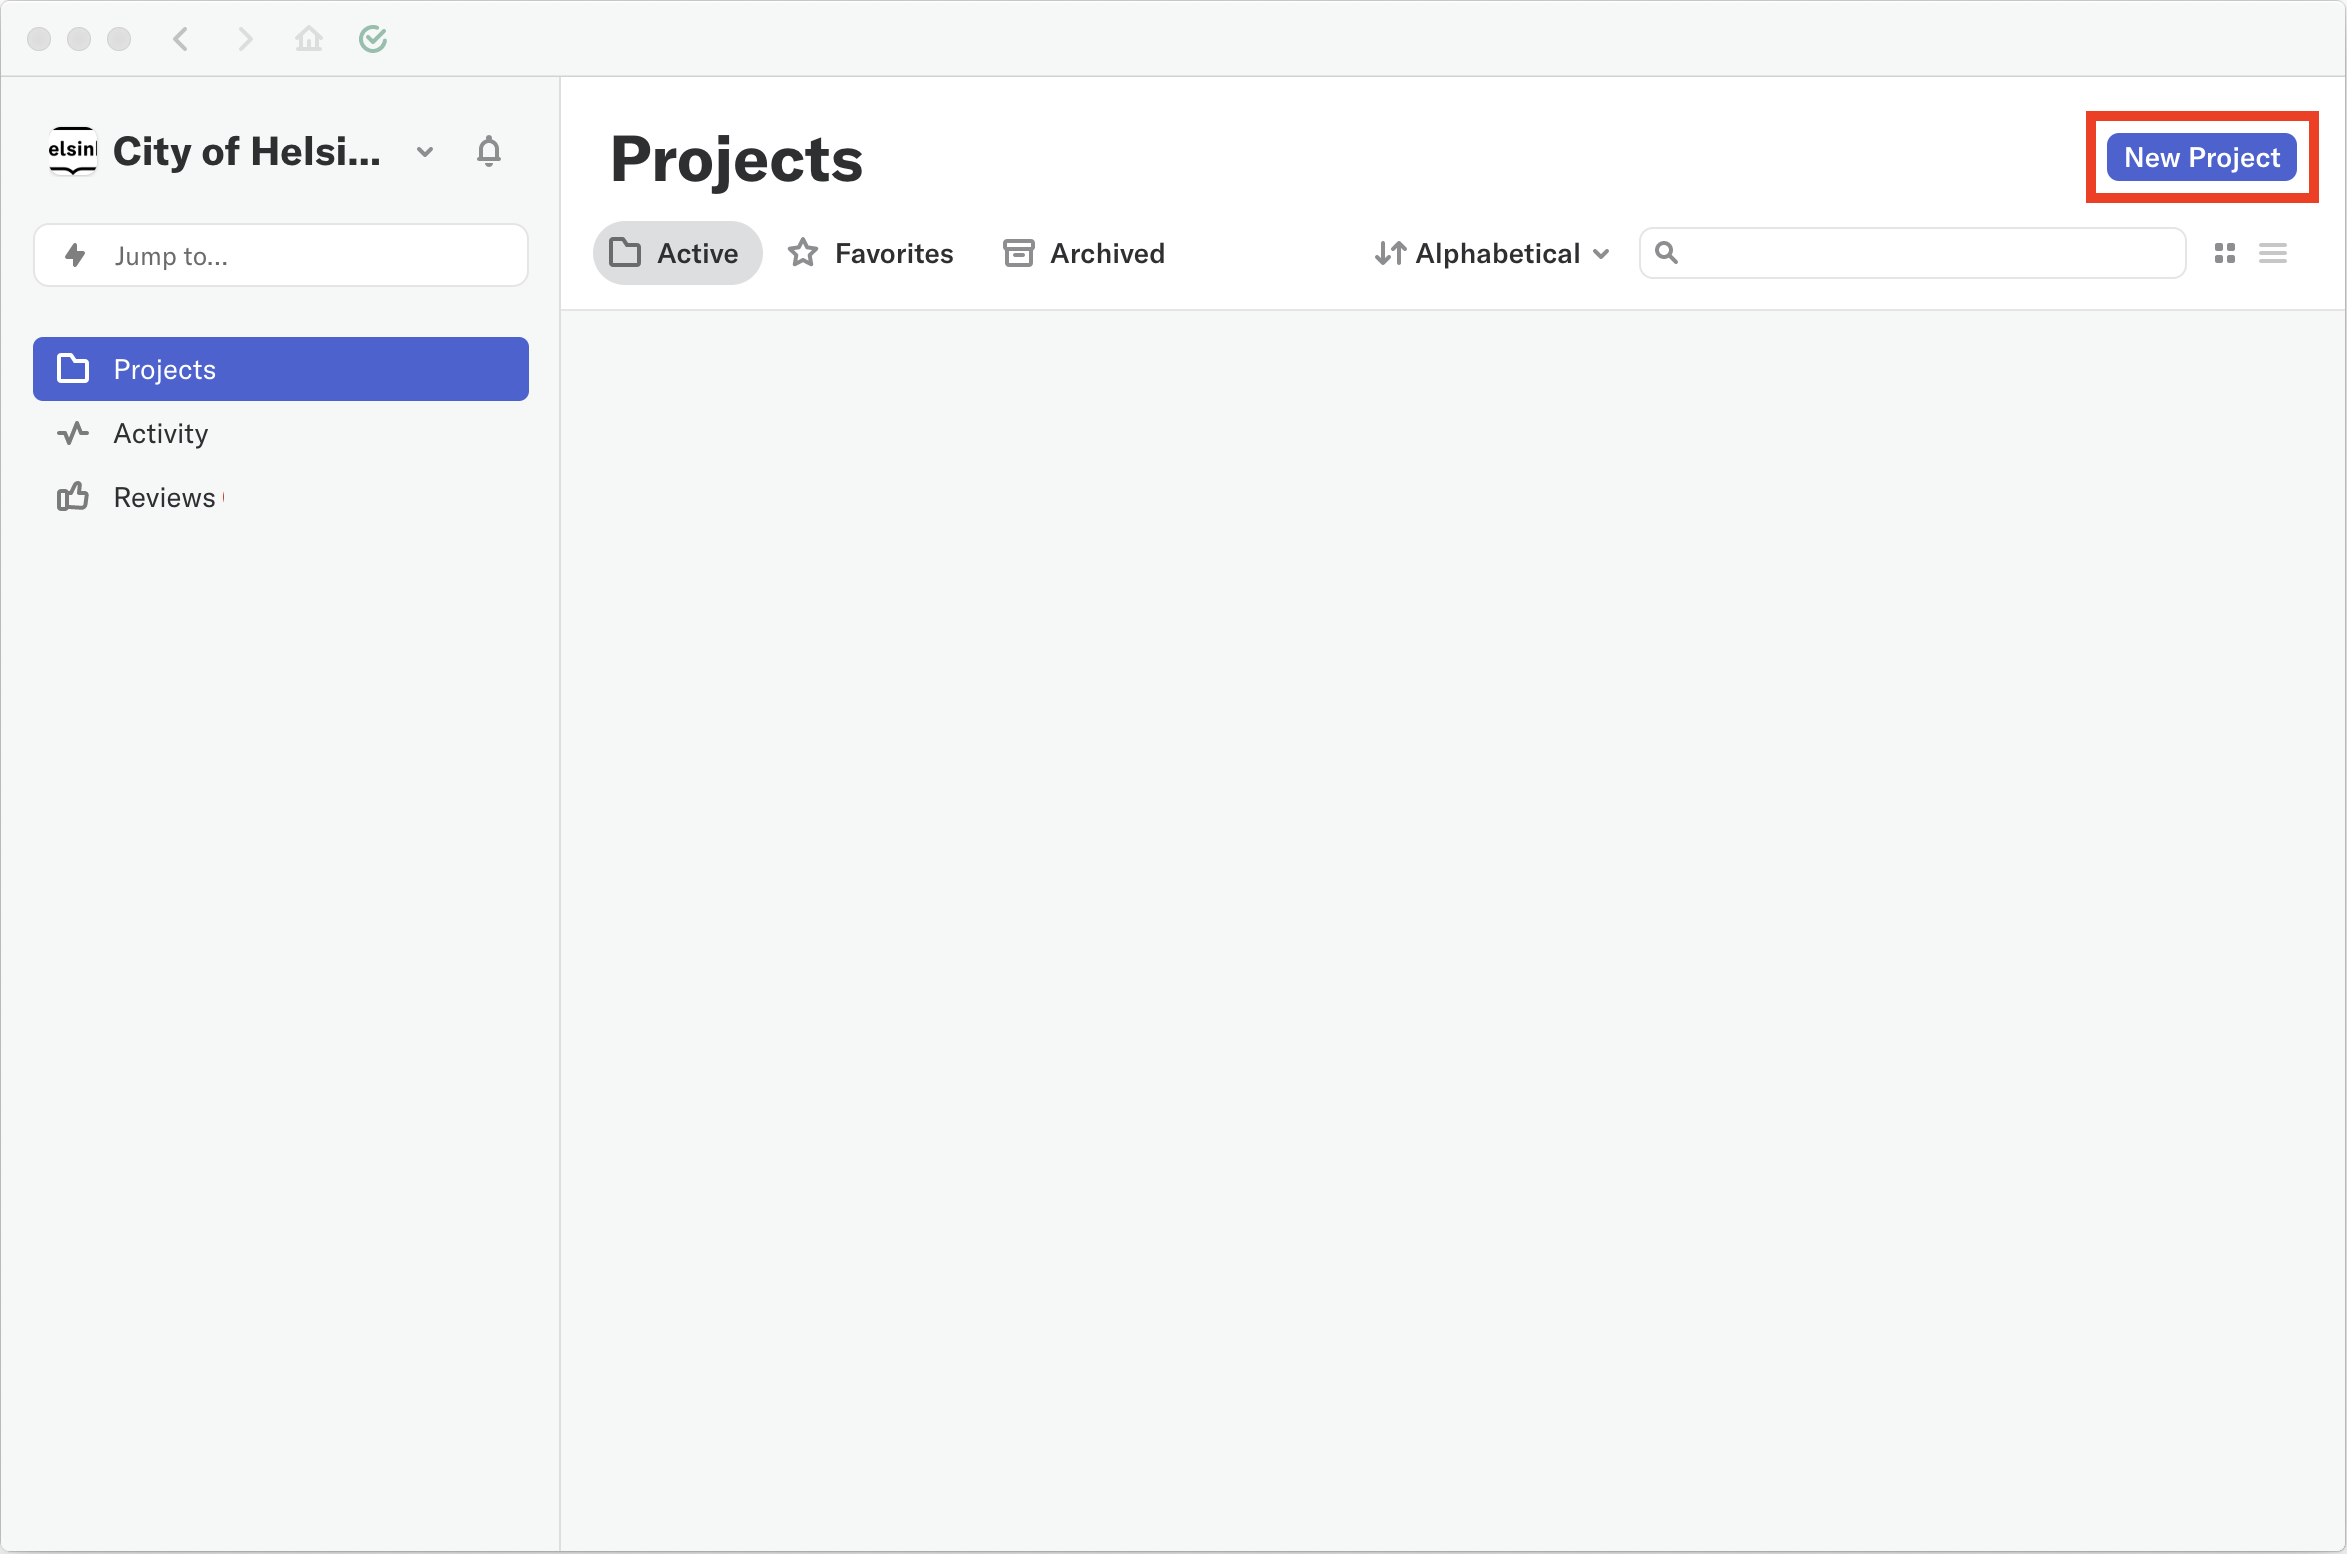
To create a new project, browse to the Abstract desktop app "Projects" page and select the "New Project" button at the top-right corner of the screen.
If you cannot see the "New Project" button, you are most likely missing the Contributor role. See the above question "Which Abstract role do you need?" for more information.
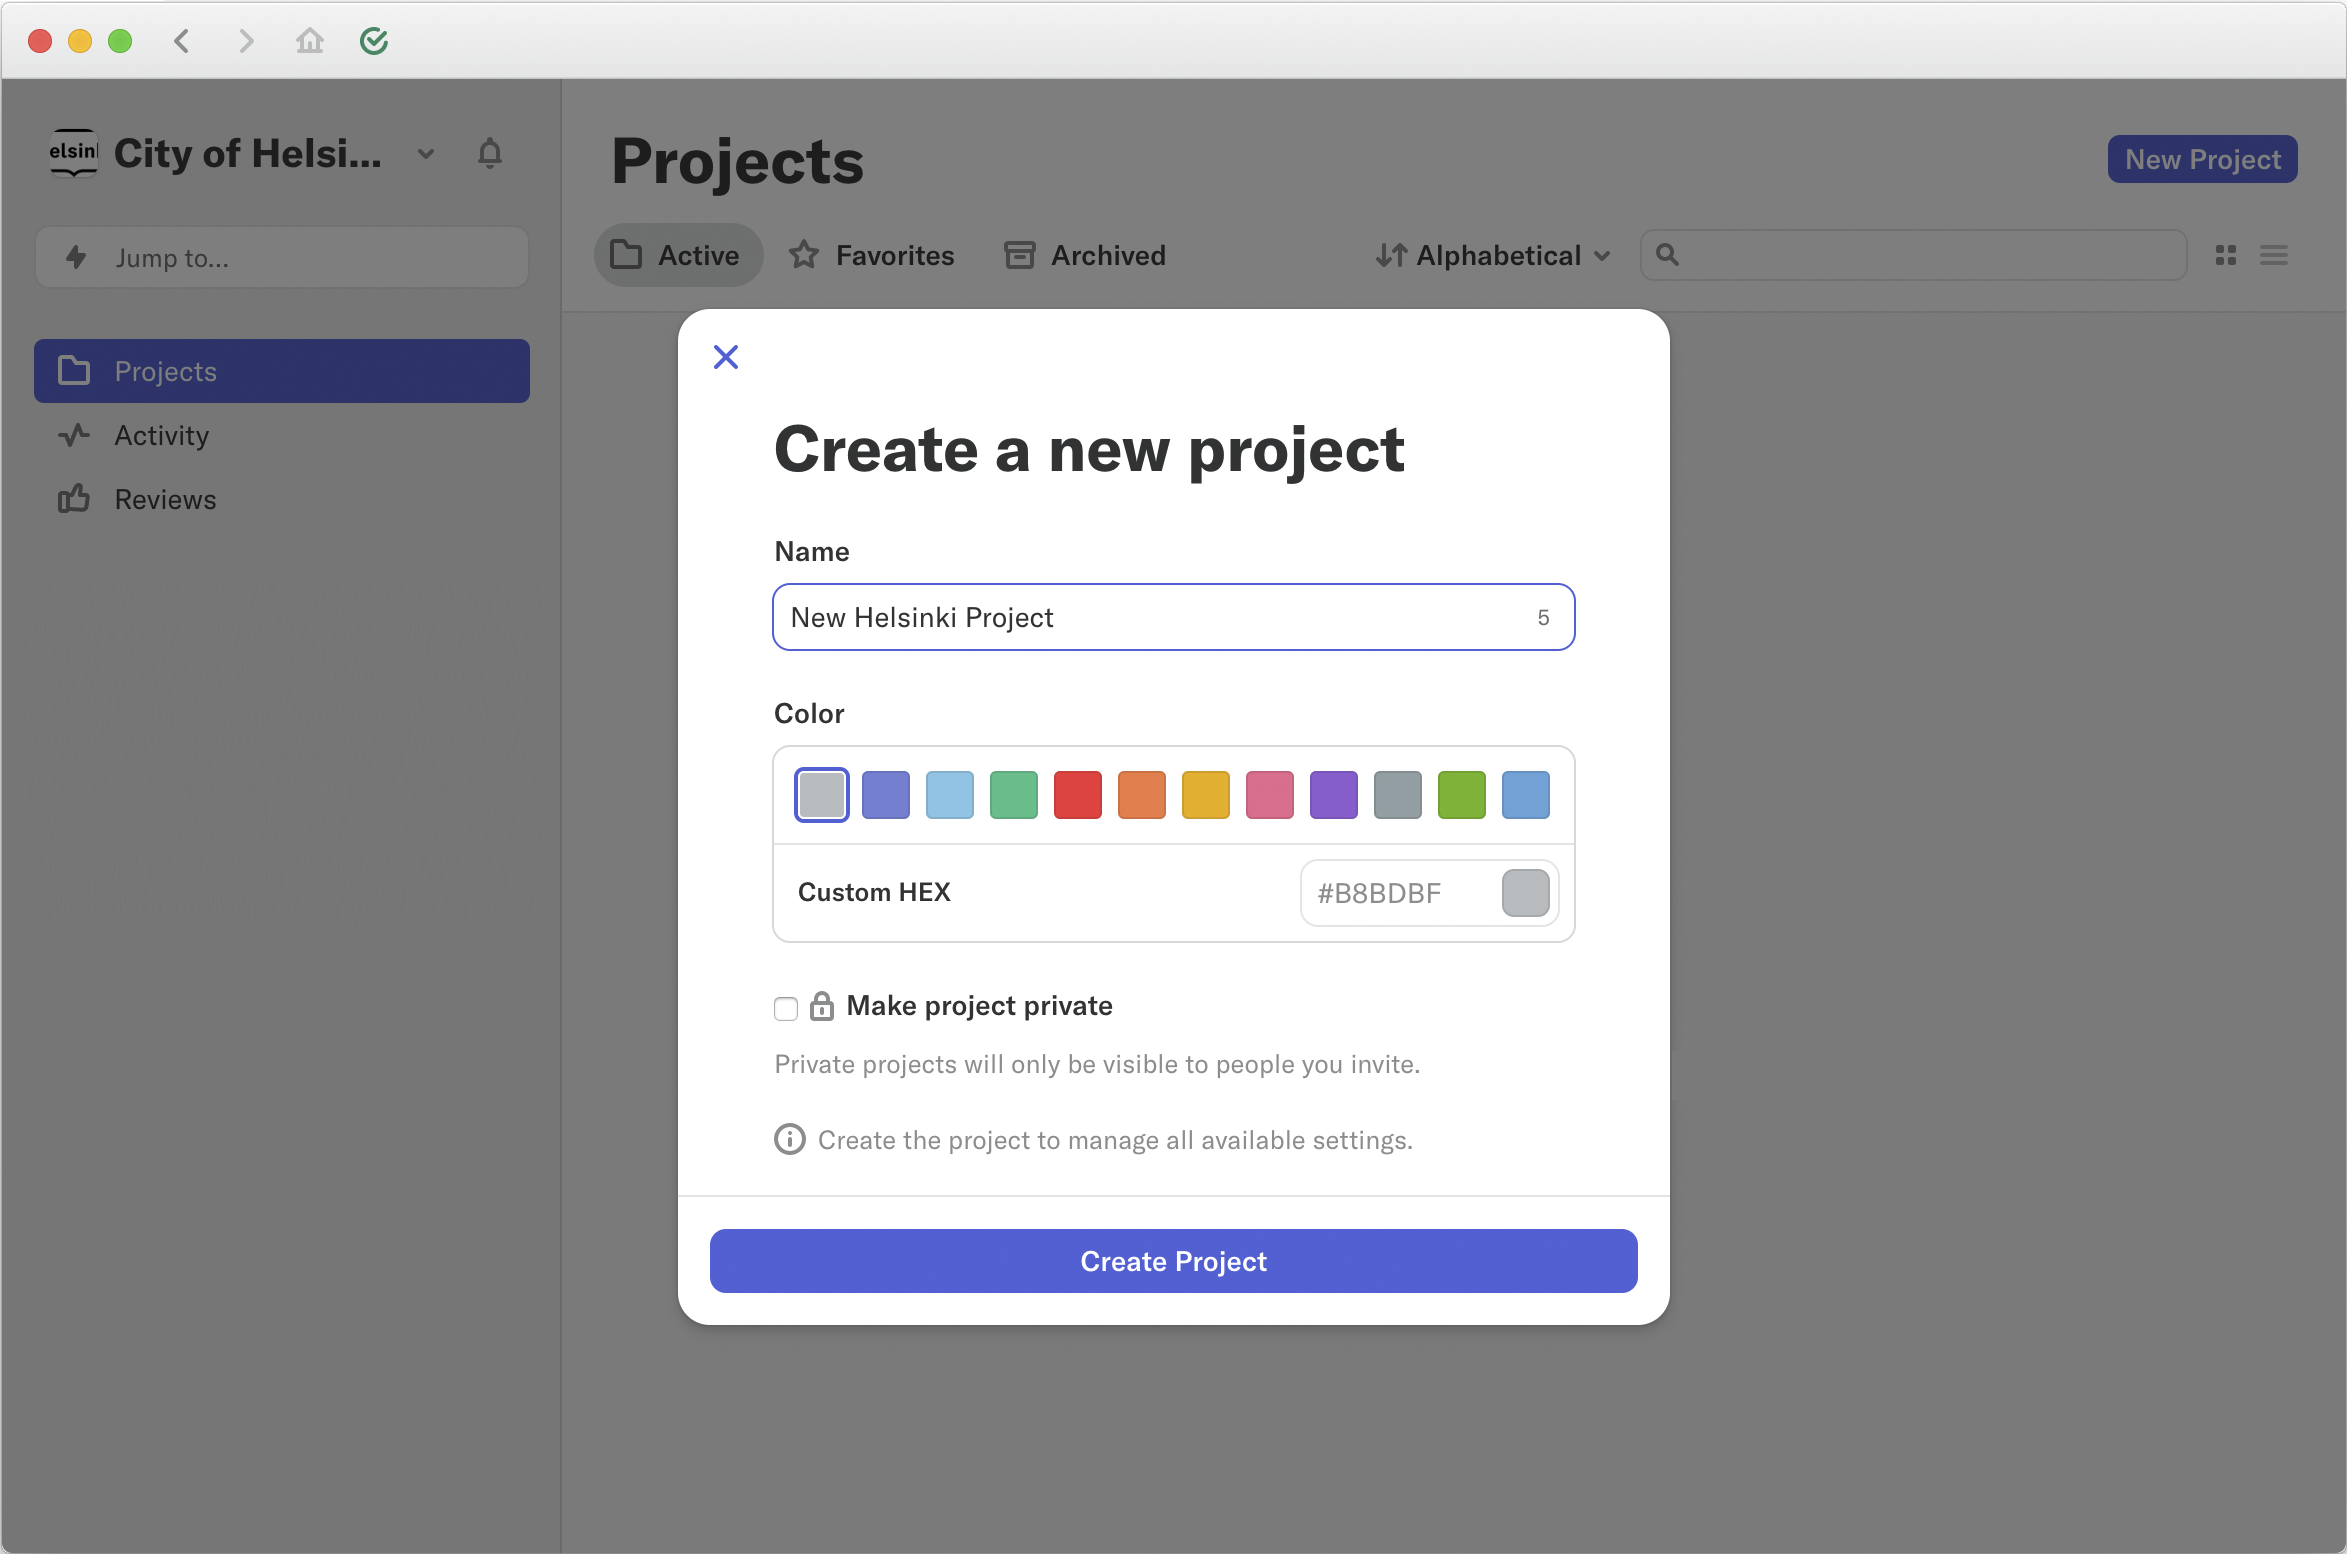
Next, input a descriptive name for your project. It is recommended not to select "Make project private" unless you have a specific reason to do so. This way your project will public for all City of Helsinki designers.
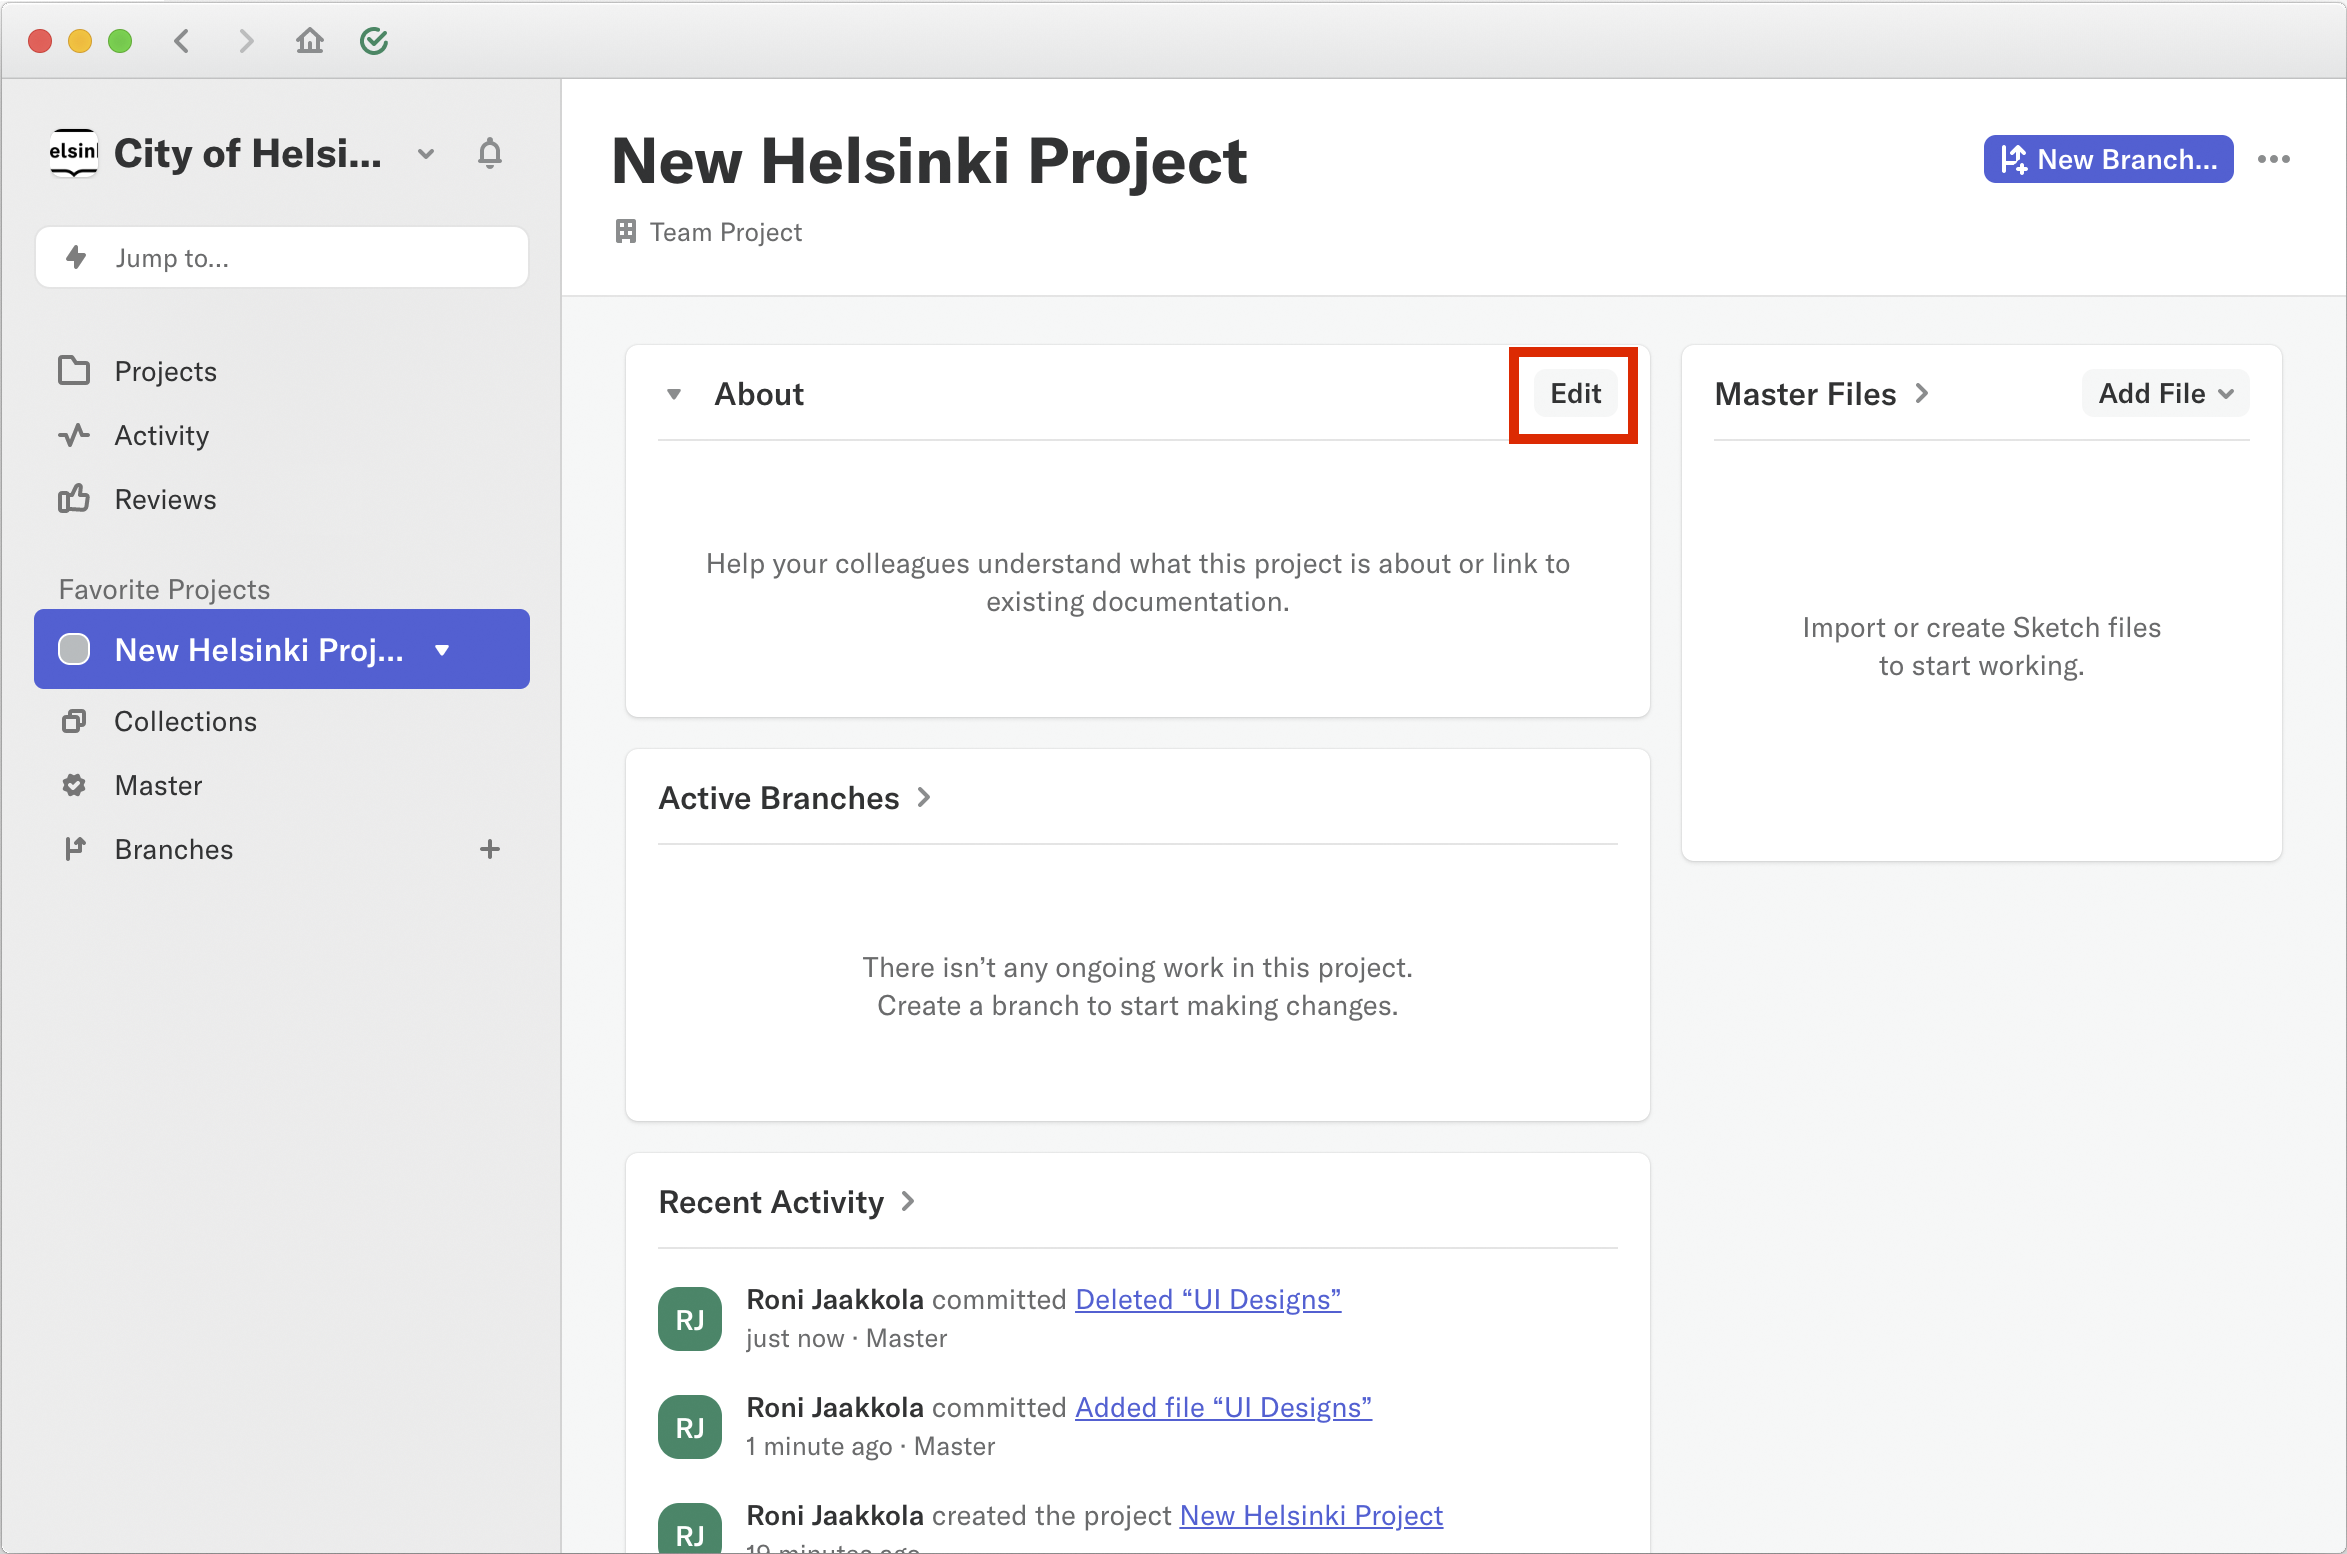
Lastly, open your newly created project and write a description for it by selecting "Edit" at the top-right corner of the "About" area. It is recommended to briefly describe the goal of the project and also provide contact information of the people responsible for the design files.
Now you are ready to start using Abstract and to create your first design files.
How to add Sketch files to a project?
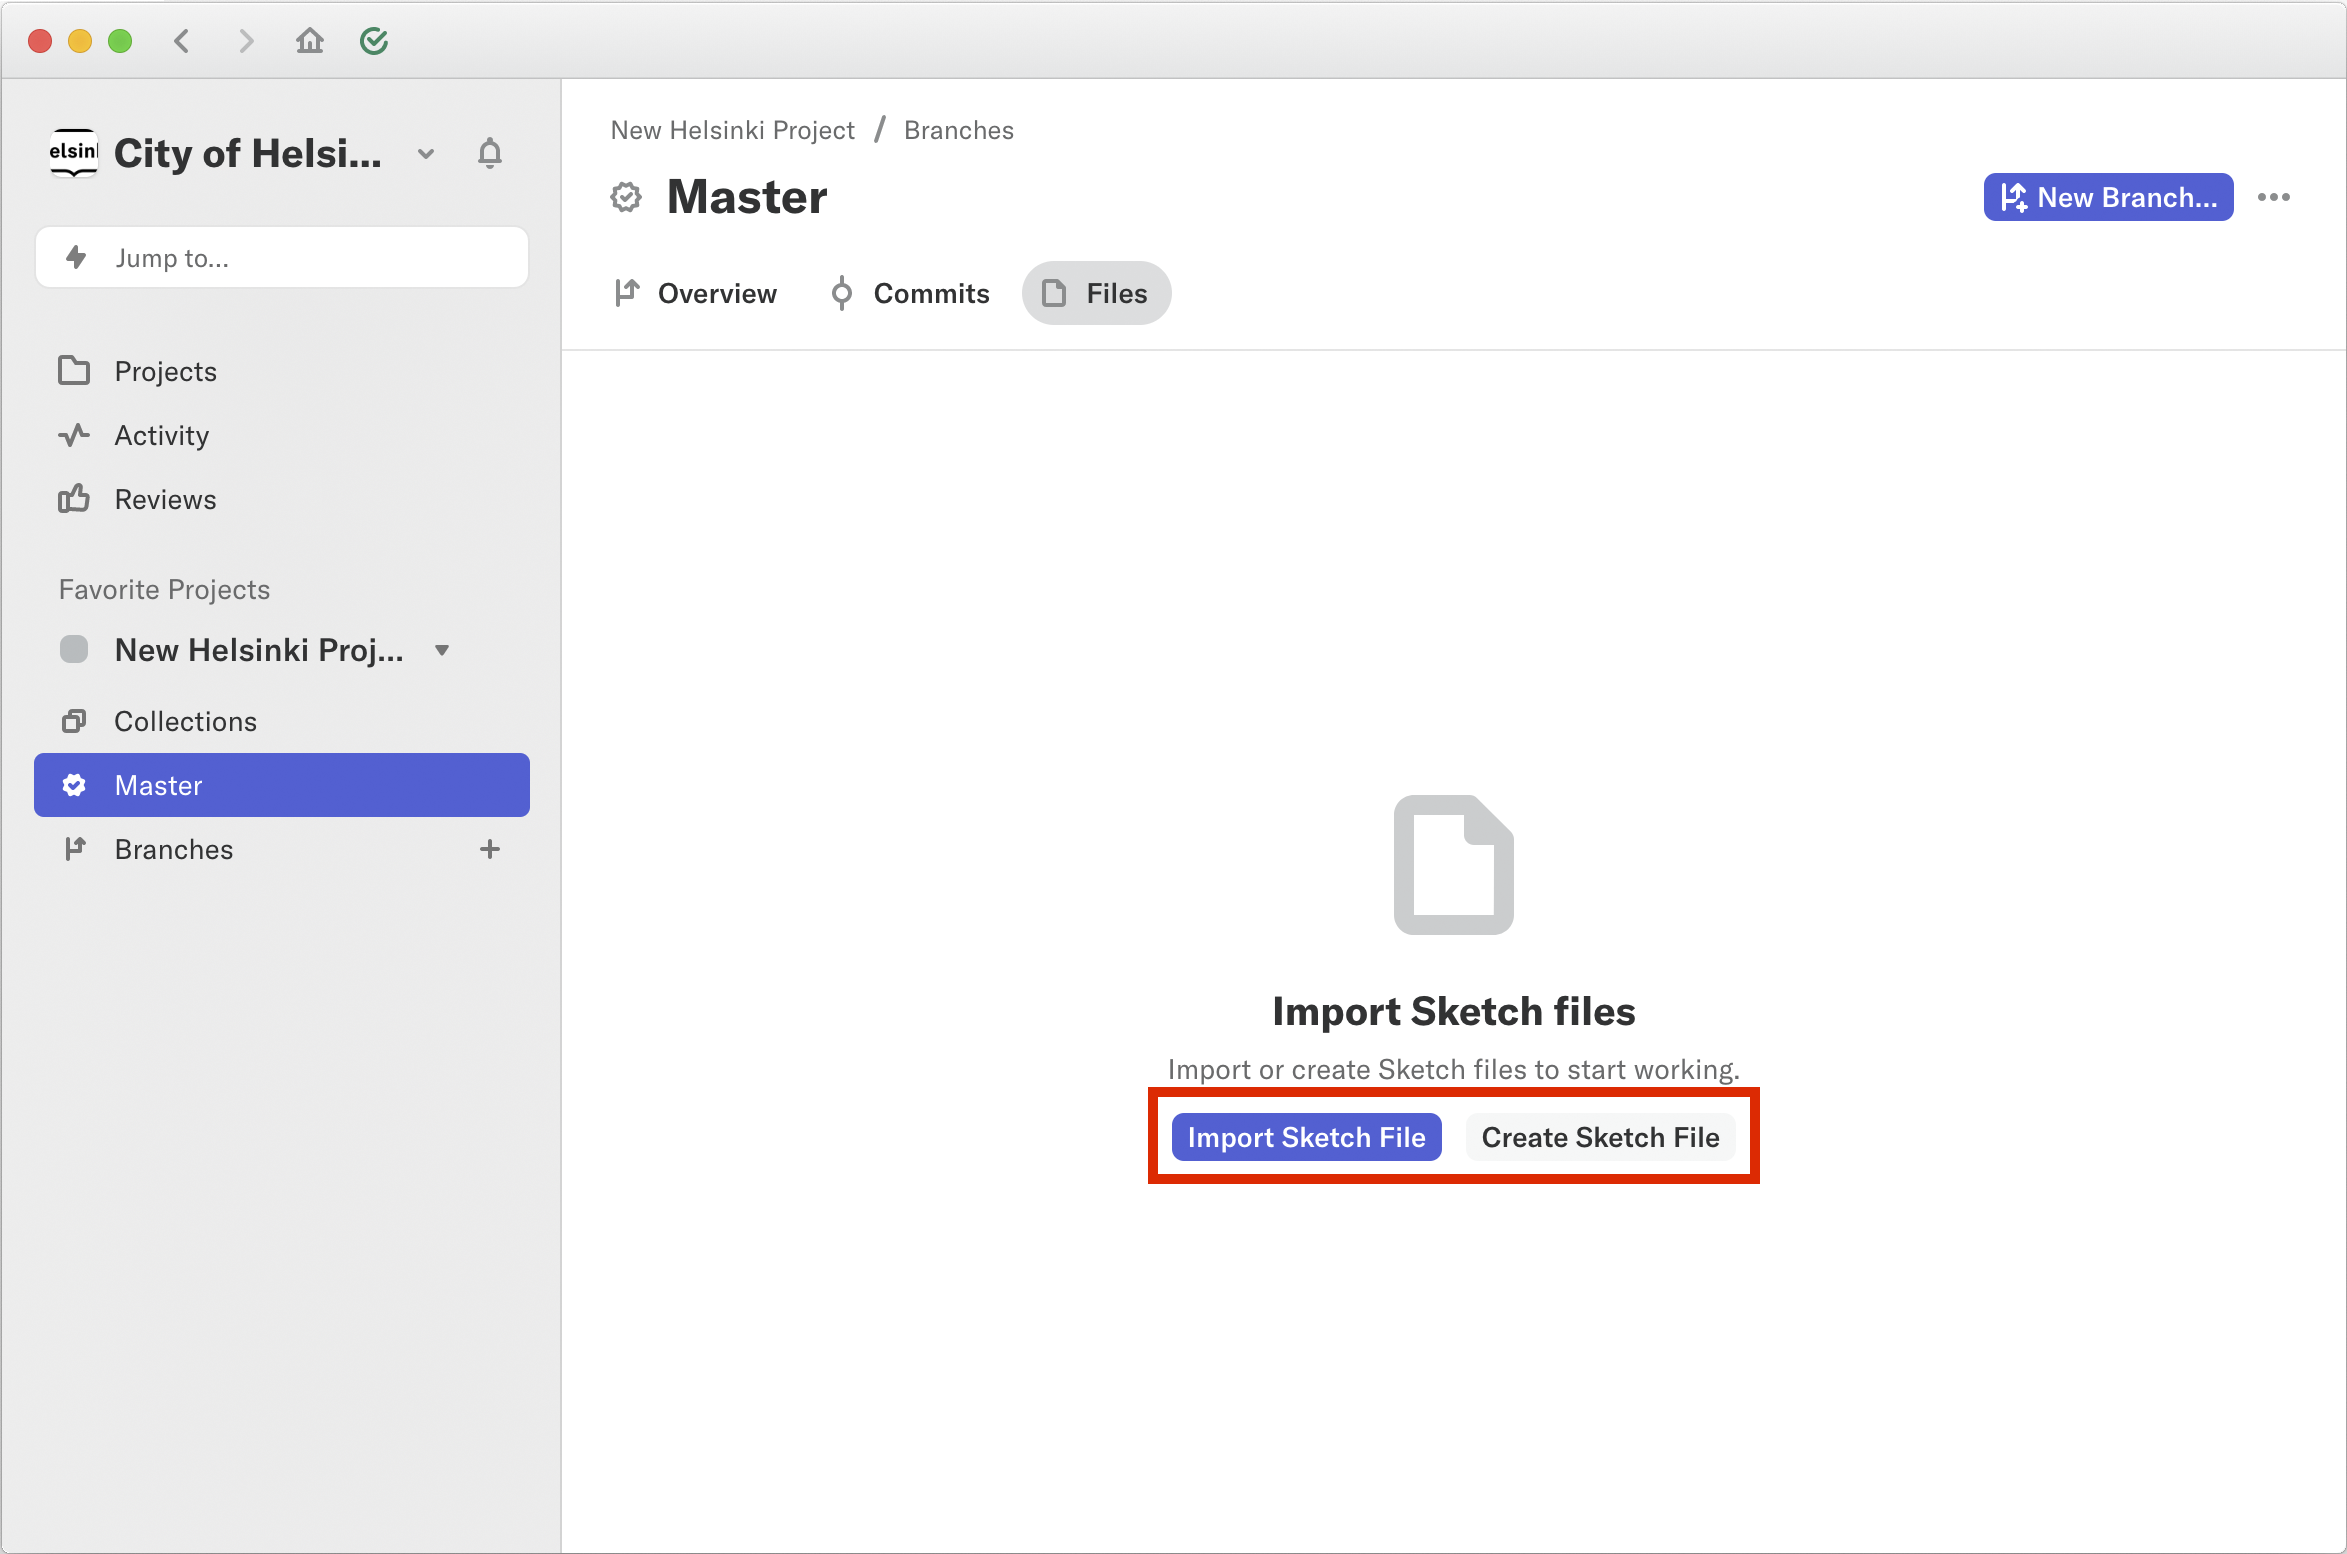
To add Sketch files to your project, open the project in the Abstract desktop app. Browse to the "Master" page and the "Files" tab. Select the "Add File" button.
If you want to create a new Sketch file, choose the "Create new file..." option. If you want to import an existing Sketch file, select the "Import File..." option.
How to link HDS libraries to a project?
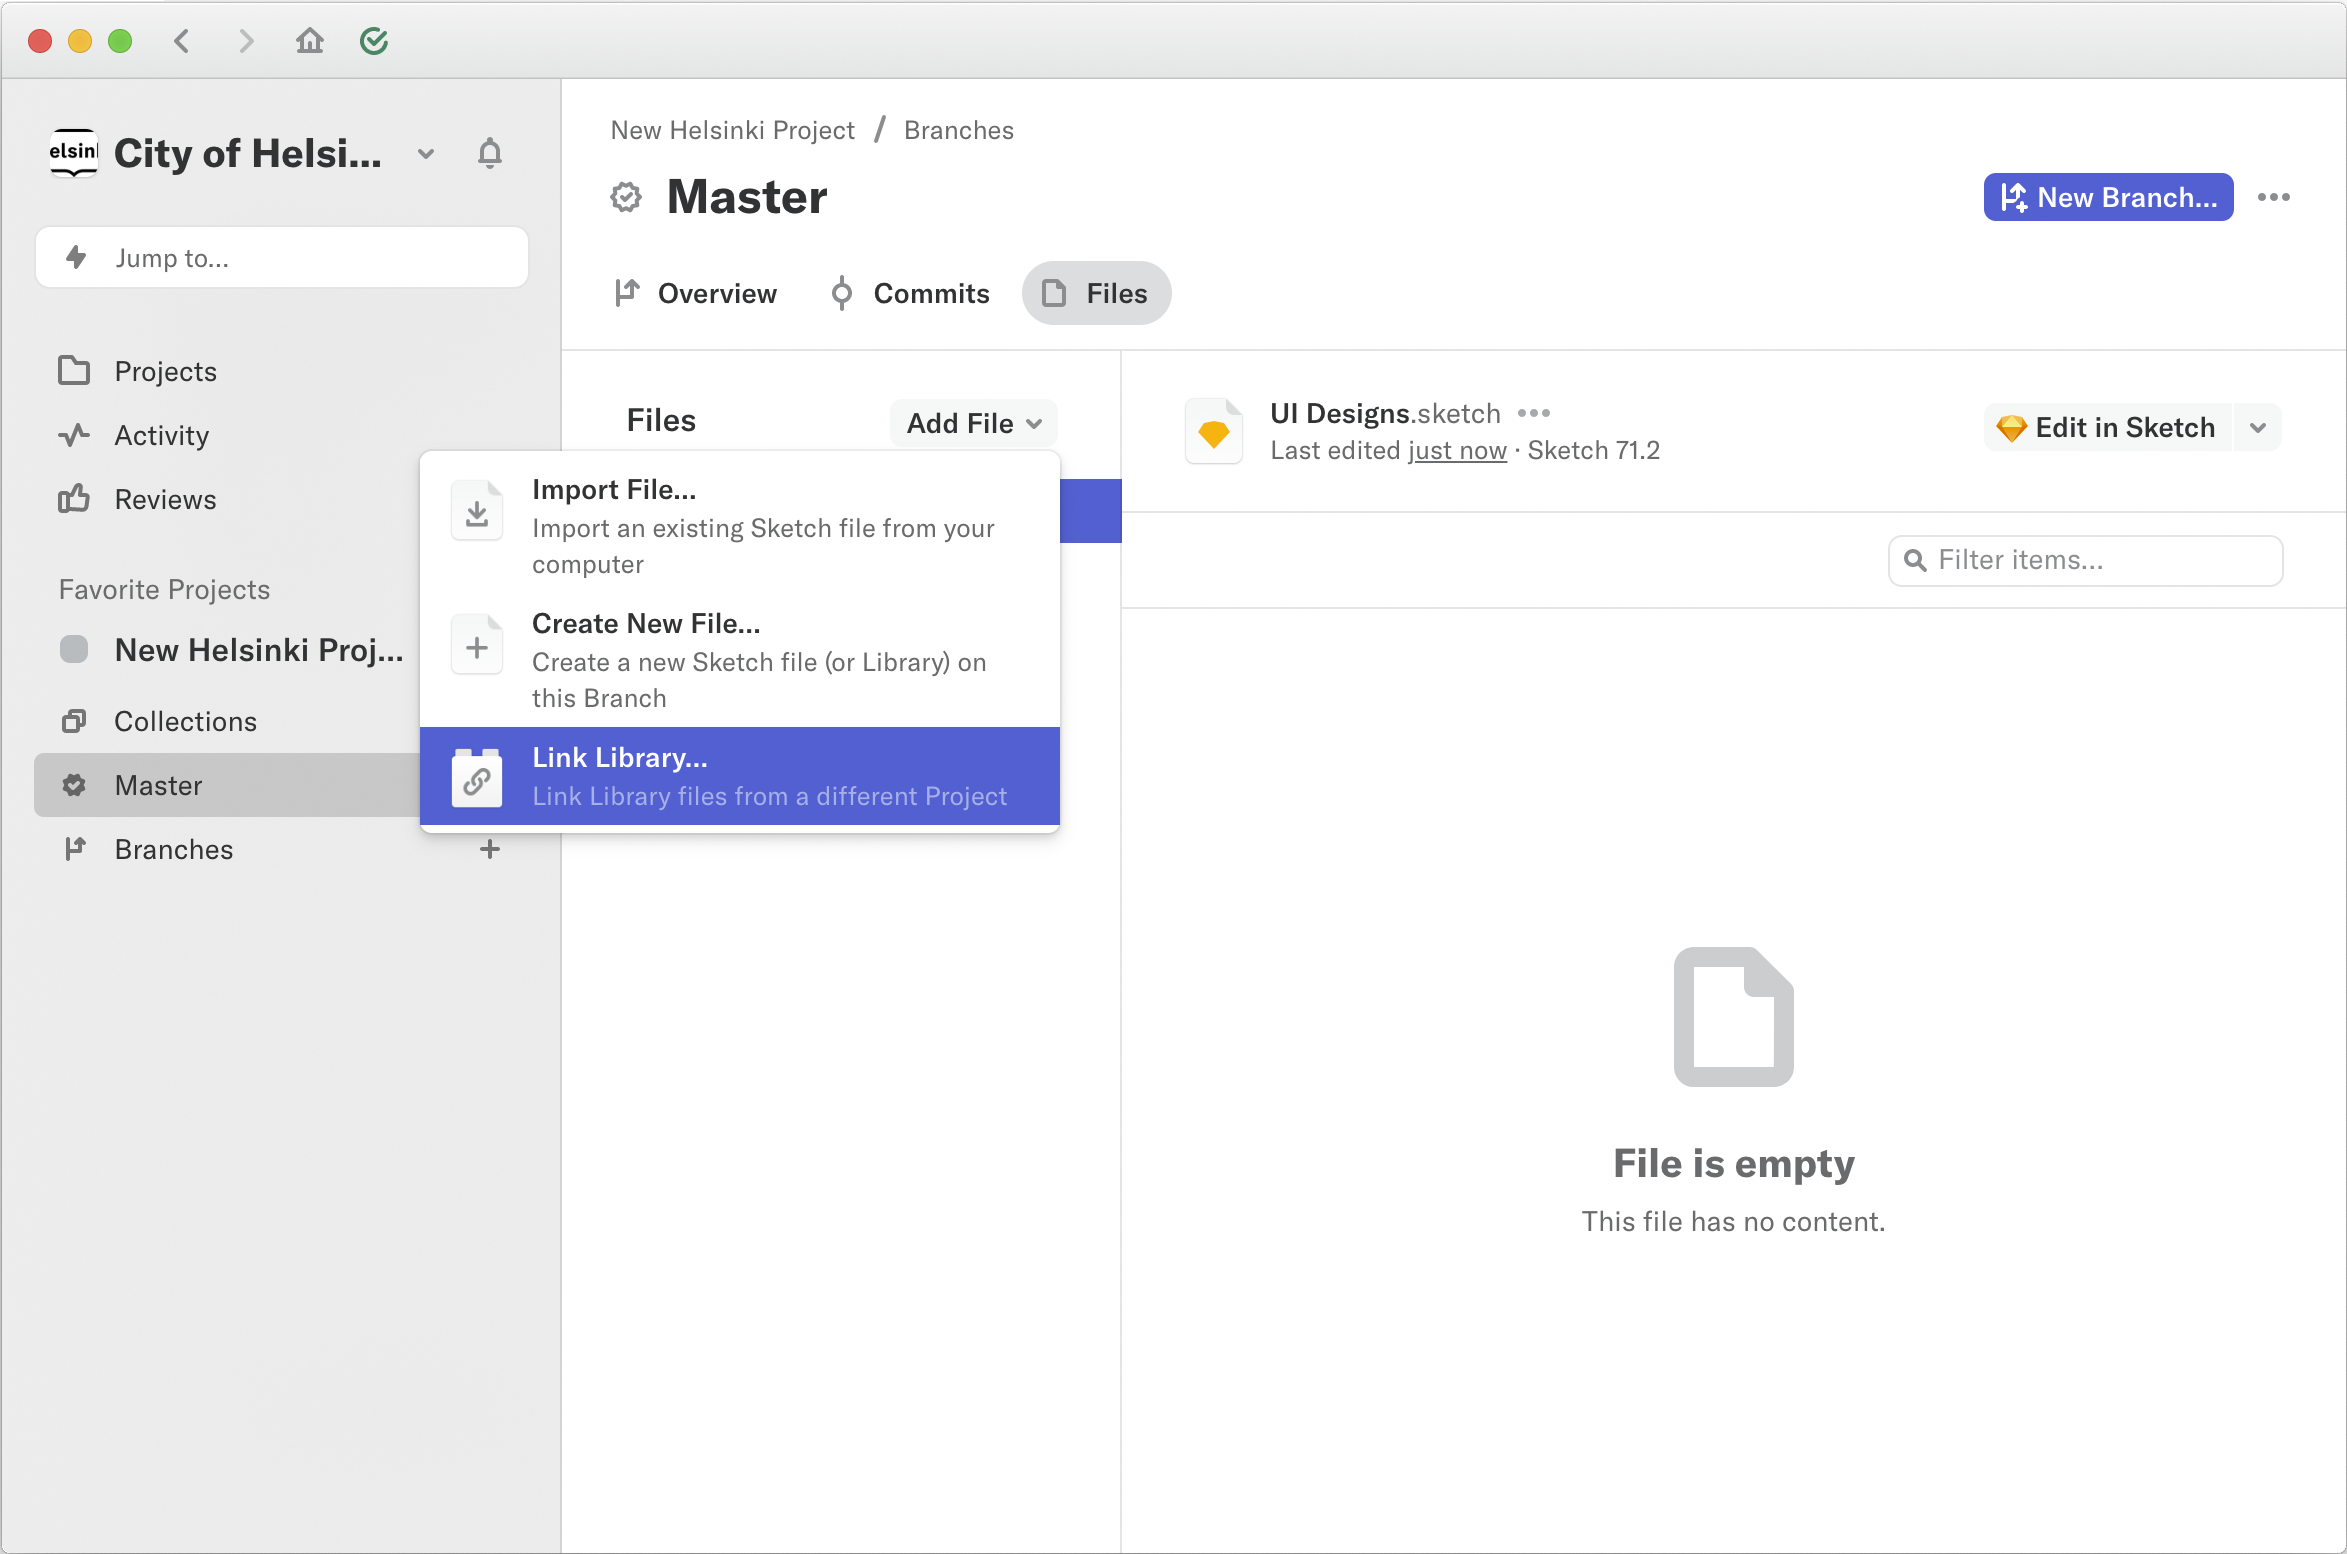
To be able to use HDS components in your design files, you need to link the design libraries to the project. To link the HDS libraries, open the project in the Abstract desktop app. Browse to the "Master" page and the "Files" tab. Select the "Add File" button and under it select the option "Link Library...".
On the left panel, find and select the project "Helsinki Design System". After this, select all files that appear on the right panel. You can select them quickly by selecting the first one, scrolling to the bottom of the list, and selecting the last one with the Shift key held down. Last, press the "Link Library" to finish the process.
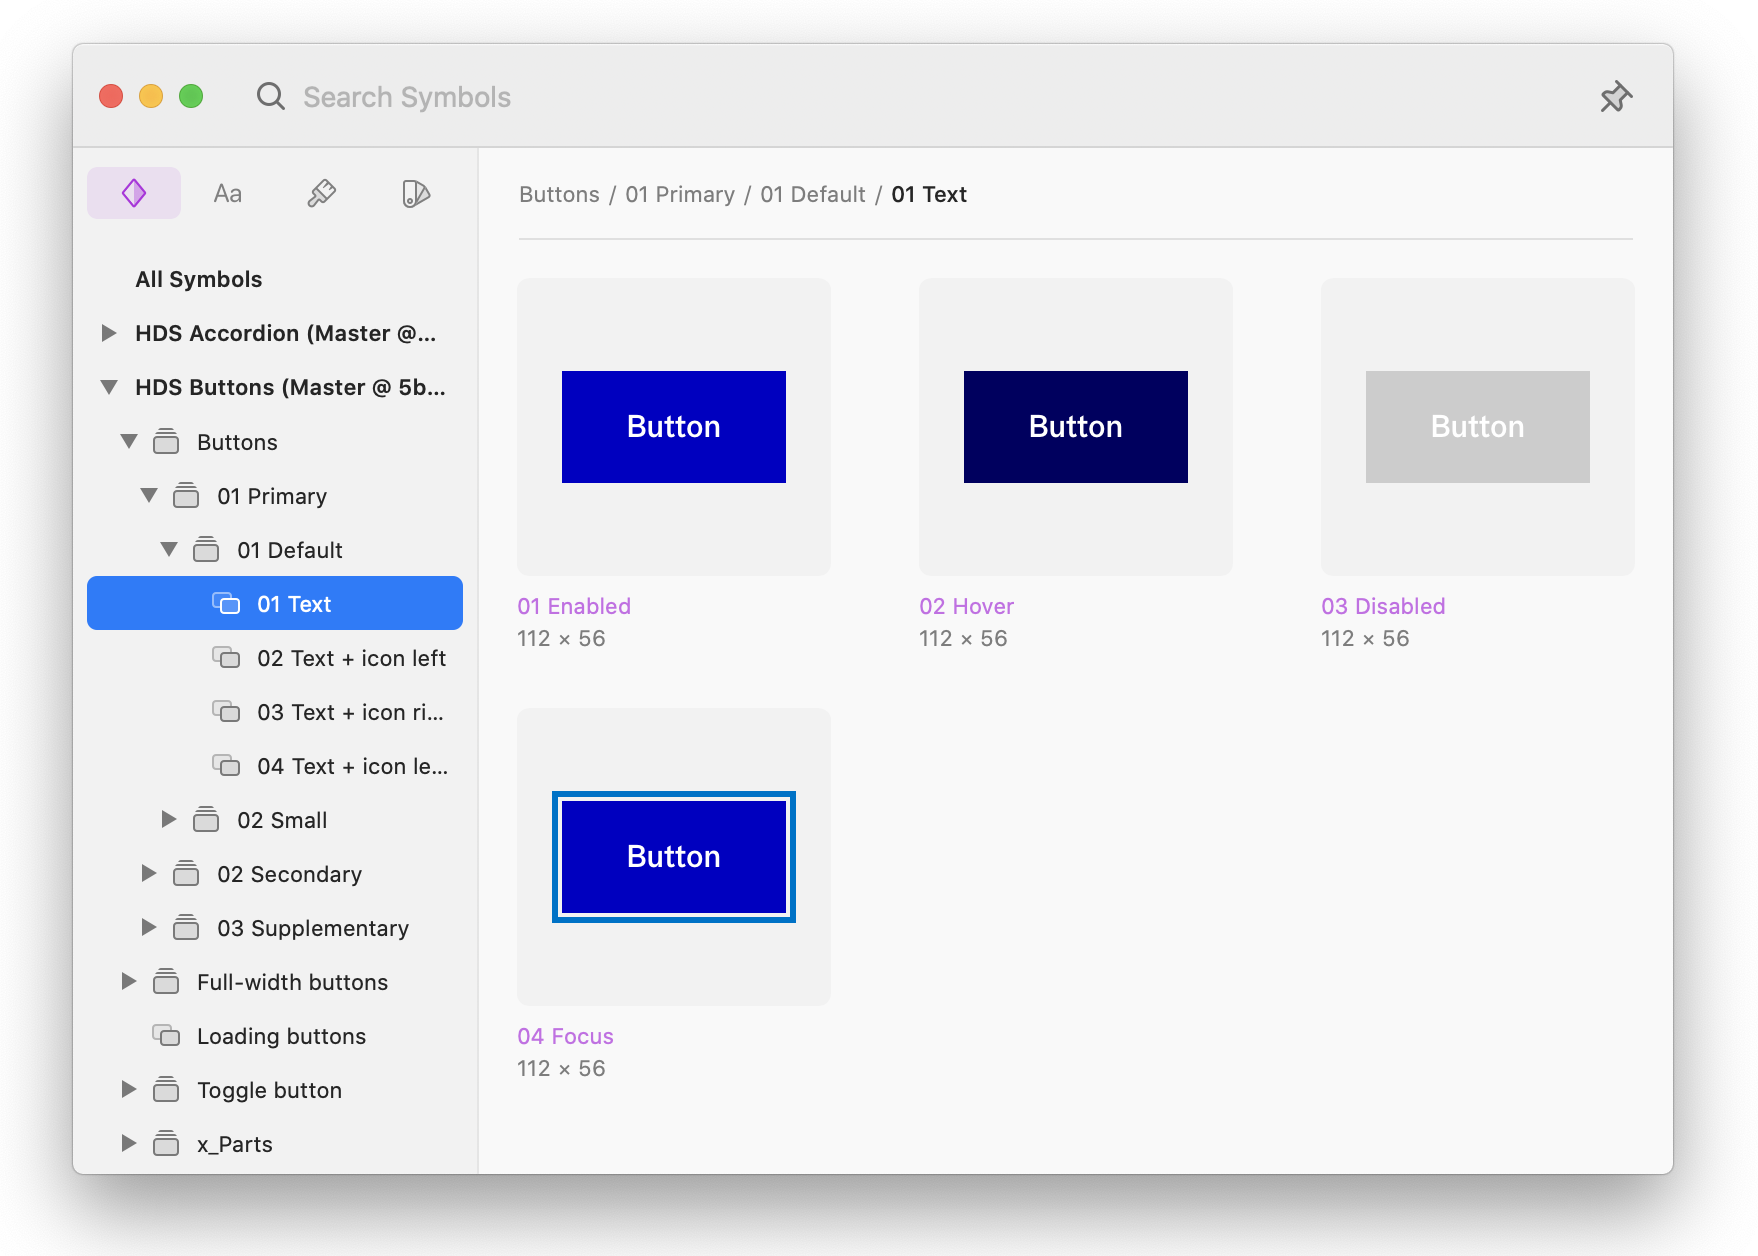
Now HDS libraries are linked to the project and they show up as symbols in the project's Sketch files.
How to use HDS components in Sketch?
To use HDS components in your Sketch files, in Sketch press the "C" key to open up the "Insert" menu. In this menu, you can type to search HDS components or select a specific HDS library on the left-hand panel. Double click the component or drag it to add it to your project artboard.
If you do not see HDS components in the "Insert" menu, please make sure you have opened the Sketch file from the Abstract app. The linked library components do not show in the menu unless the file has been opened via Abstract. Also note, that after opening Sketch it may take several seconds before all of the libraries appear on the list.
How to update HDS libraries?
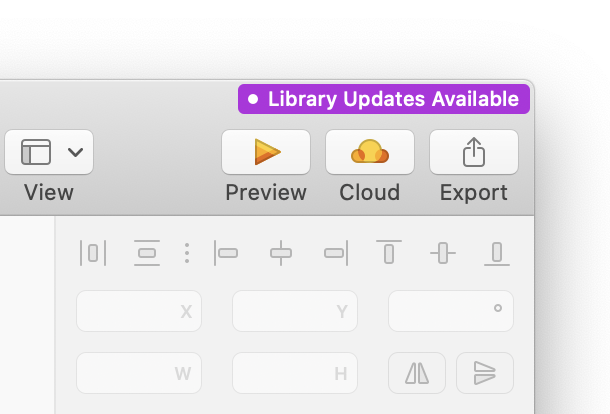
When HDS design libraries update, you will receive a small notification "Library Updates Available" at the top-right corner of the Sketch window.
Clicking the notification opens a window in which you can review the changes the HDS has made to the components. While it is recommended to keep your HDS components updated, you can also opt-out of the specific component update if needed. This can be useful if the change is significant and your project does not have time to adapt to the change. It is always a good practice to read through the most recent HDS changelogs in GitHub before updating. After selecting the components you wish to update, press the "Update Components" button to finish the process. Note that if you have multiple design files in your project, you may need to repeat this process to all of them.
How to make your first design change?
Abstract follows a pattern of Branch → Edit → Merge which is familiar from software version control systems such as Git. Each Abstract project has its own Master Branch that is the single source of truth, the latest accepted design for that project.
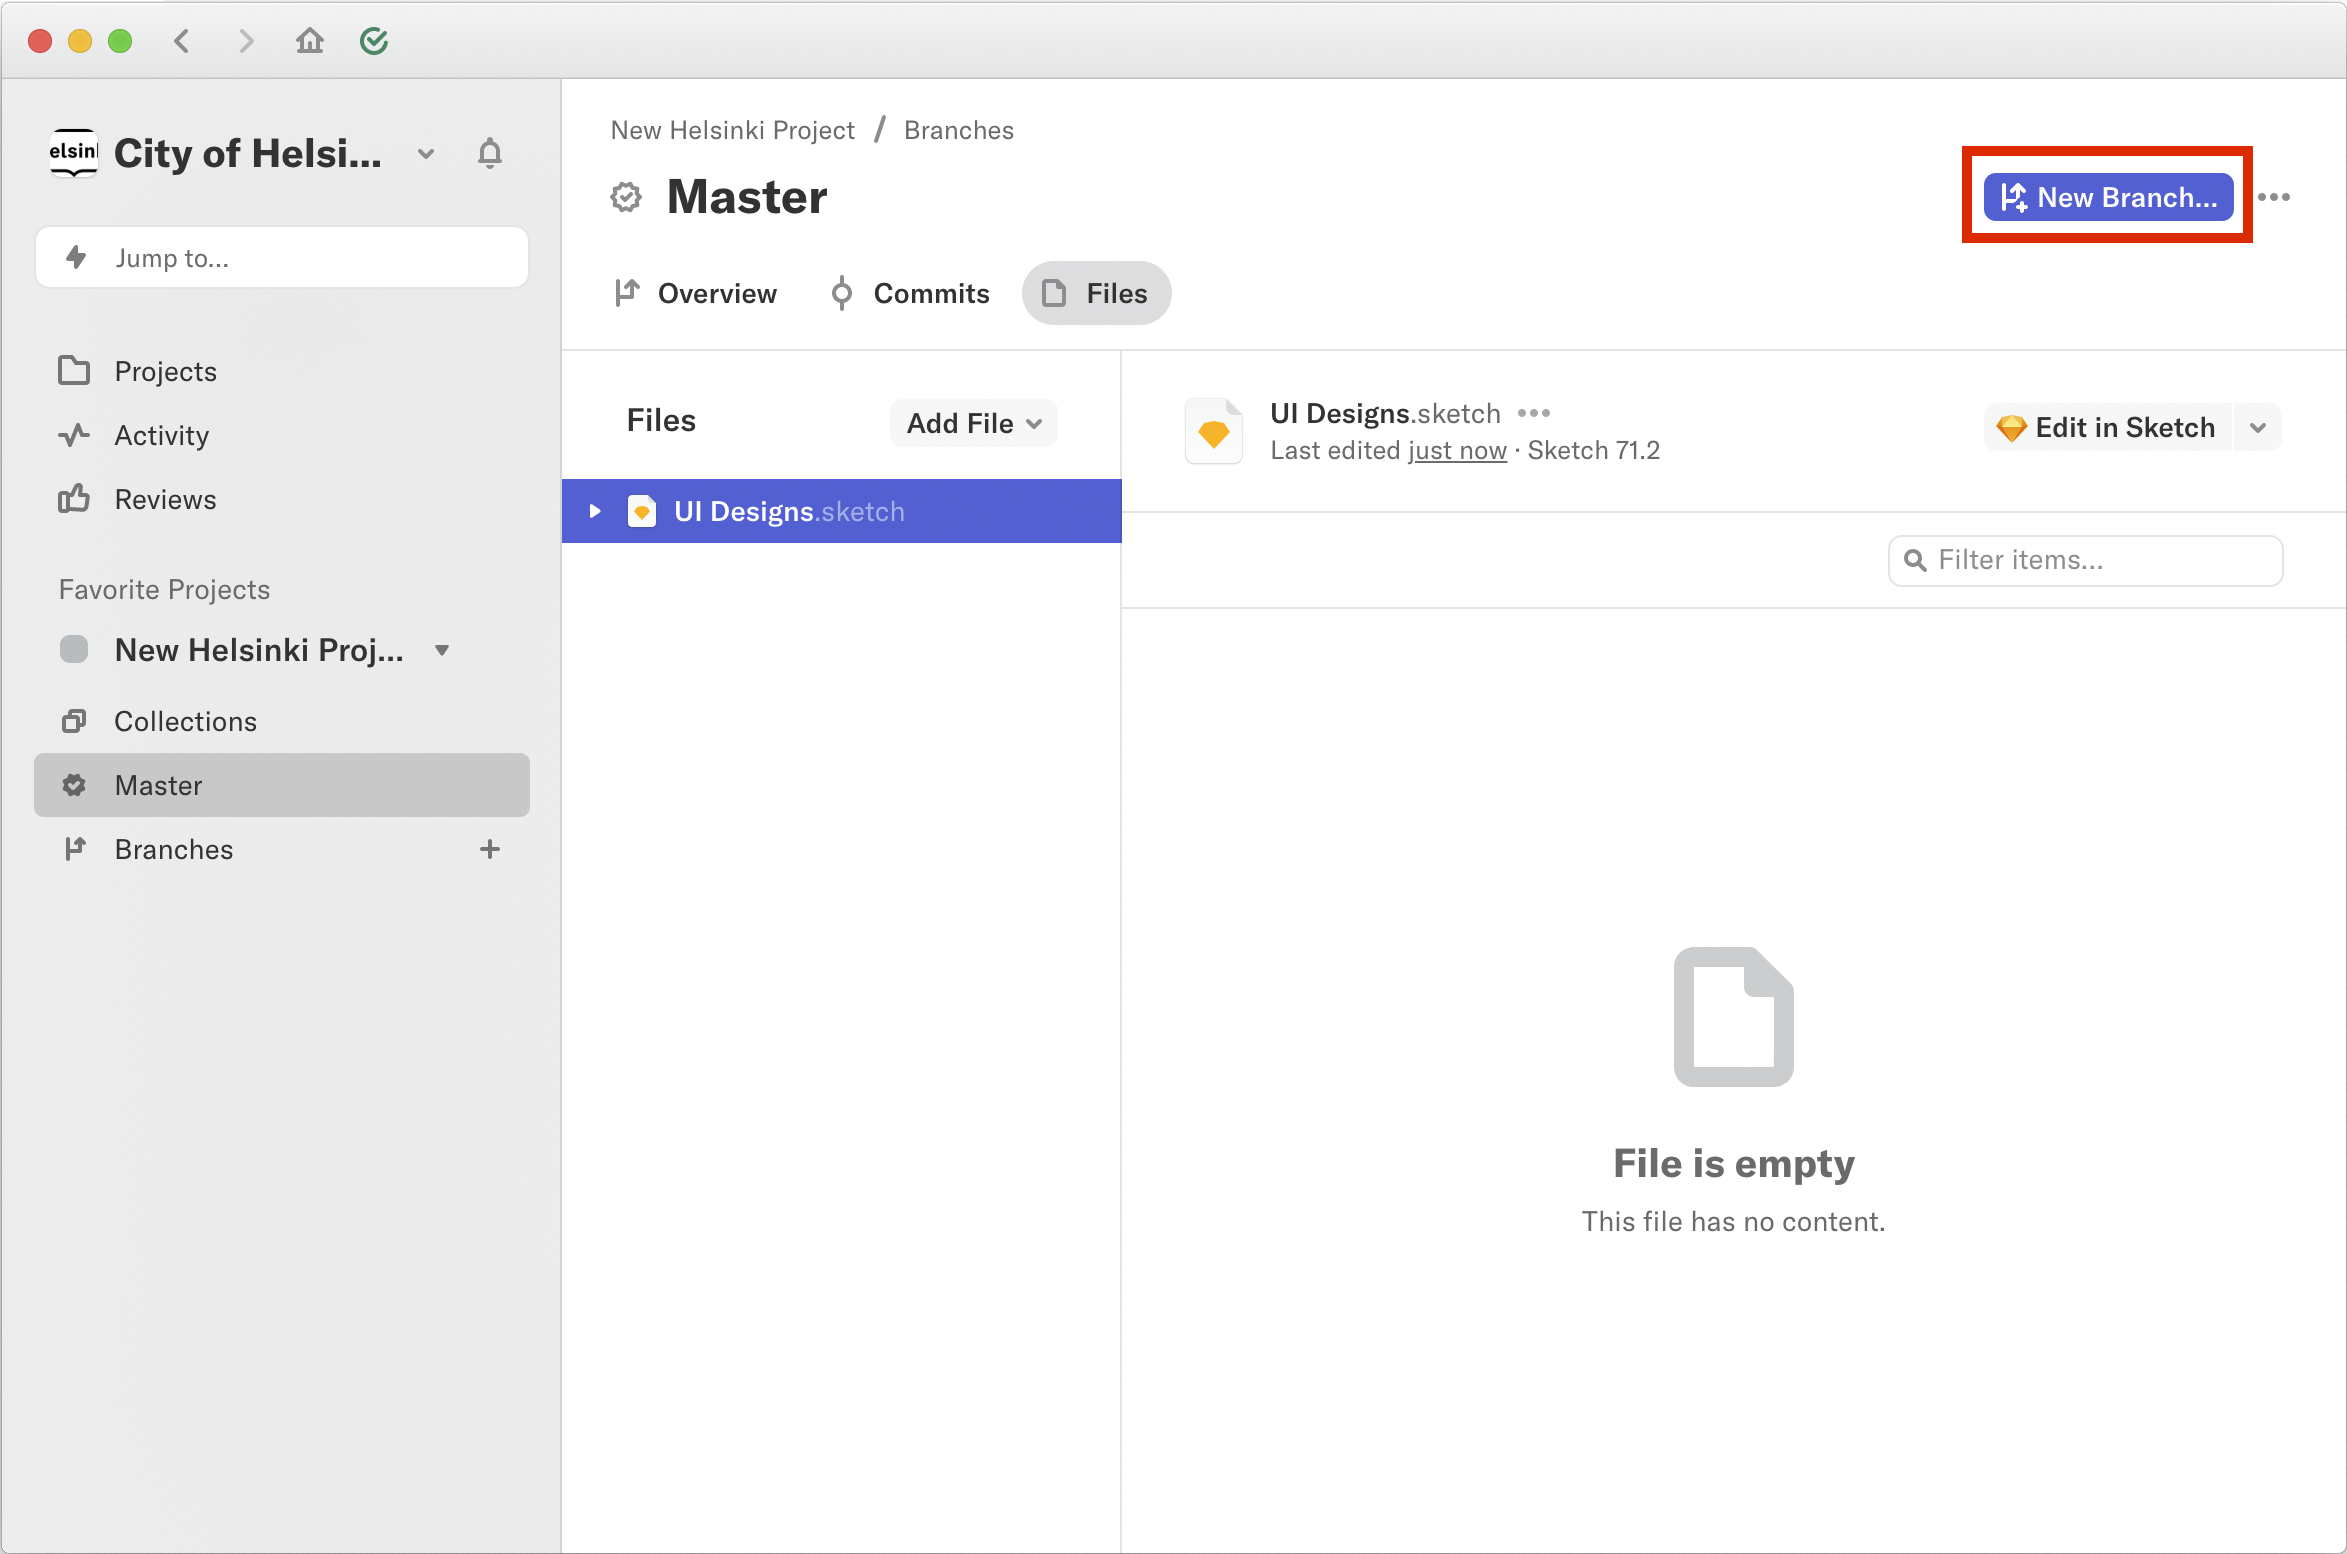
To make changes to the Master Branch, you first need to create a new branch for your changes. To create a new branch, press the plus (+) icon next to the "Branches" page link.
Give your branch a descriptive name. Many teams even include a JIRA (or similar software) ticket number in the branch name. For example, the branch name could be "login-page (HDS-123)".
Your newly created branch is a perfect copy of your Master Branch. You can now freely explore design ideas without worrying about changing the Master Branch or messing up other designers' branches.
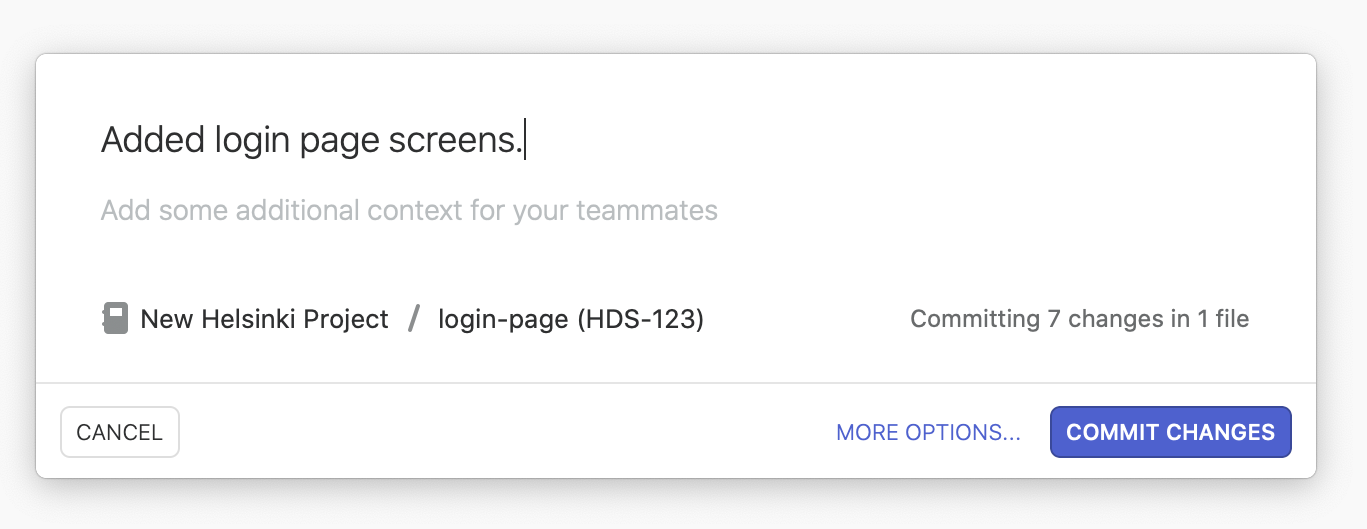
To save an edit to your branch, you need to do a Commit. Commits can be made in the Abstract desktop app but the easier way is to do them directly from Sketch. When Abstract detects new changes in your Sketch file, a commit popup will appear at the bottom-middle of the Sketch window. Pressing the "Commit Changes" button allows you to write a commit message. The commit message describes what changes the commit includes and it is usually a couple of sentences long at maximum. After writing the commit message, press the "Commit Changes" button to finish the commit.
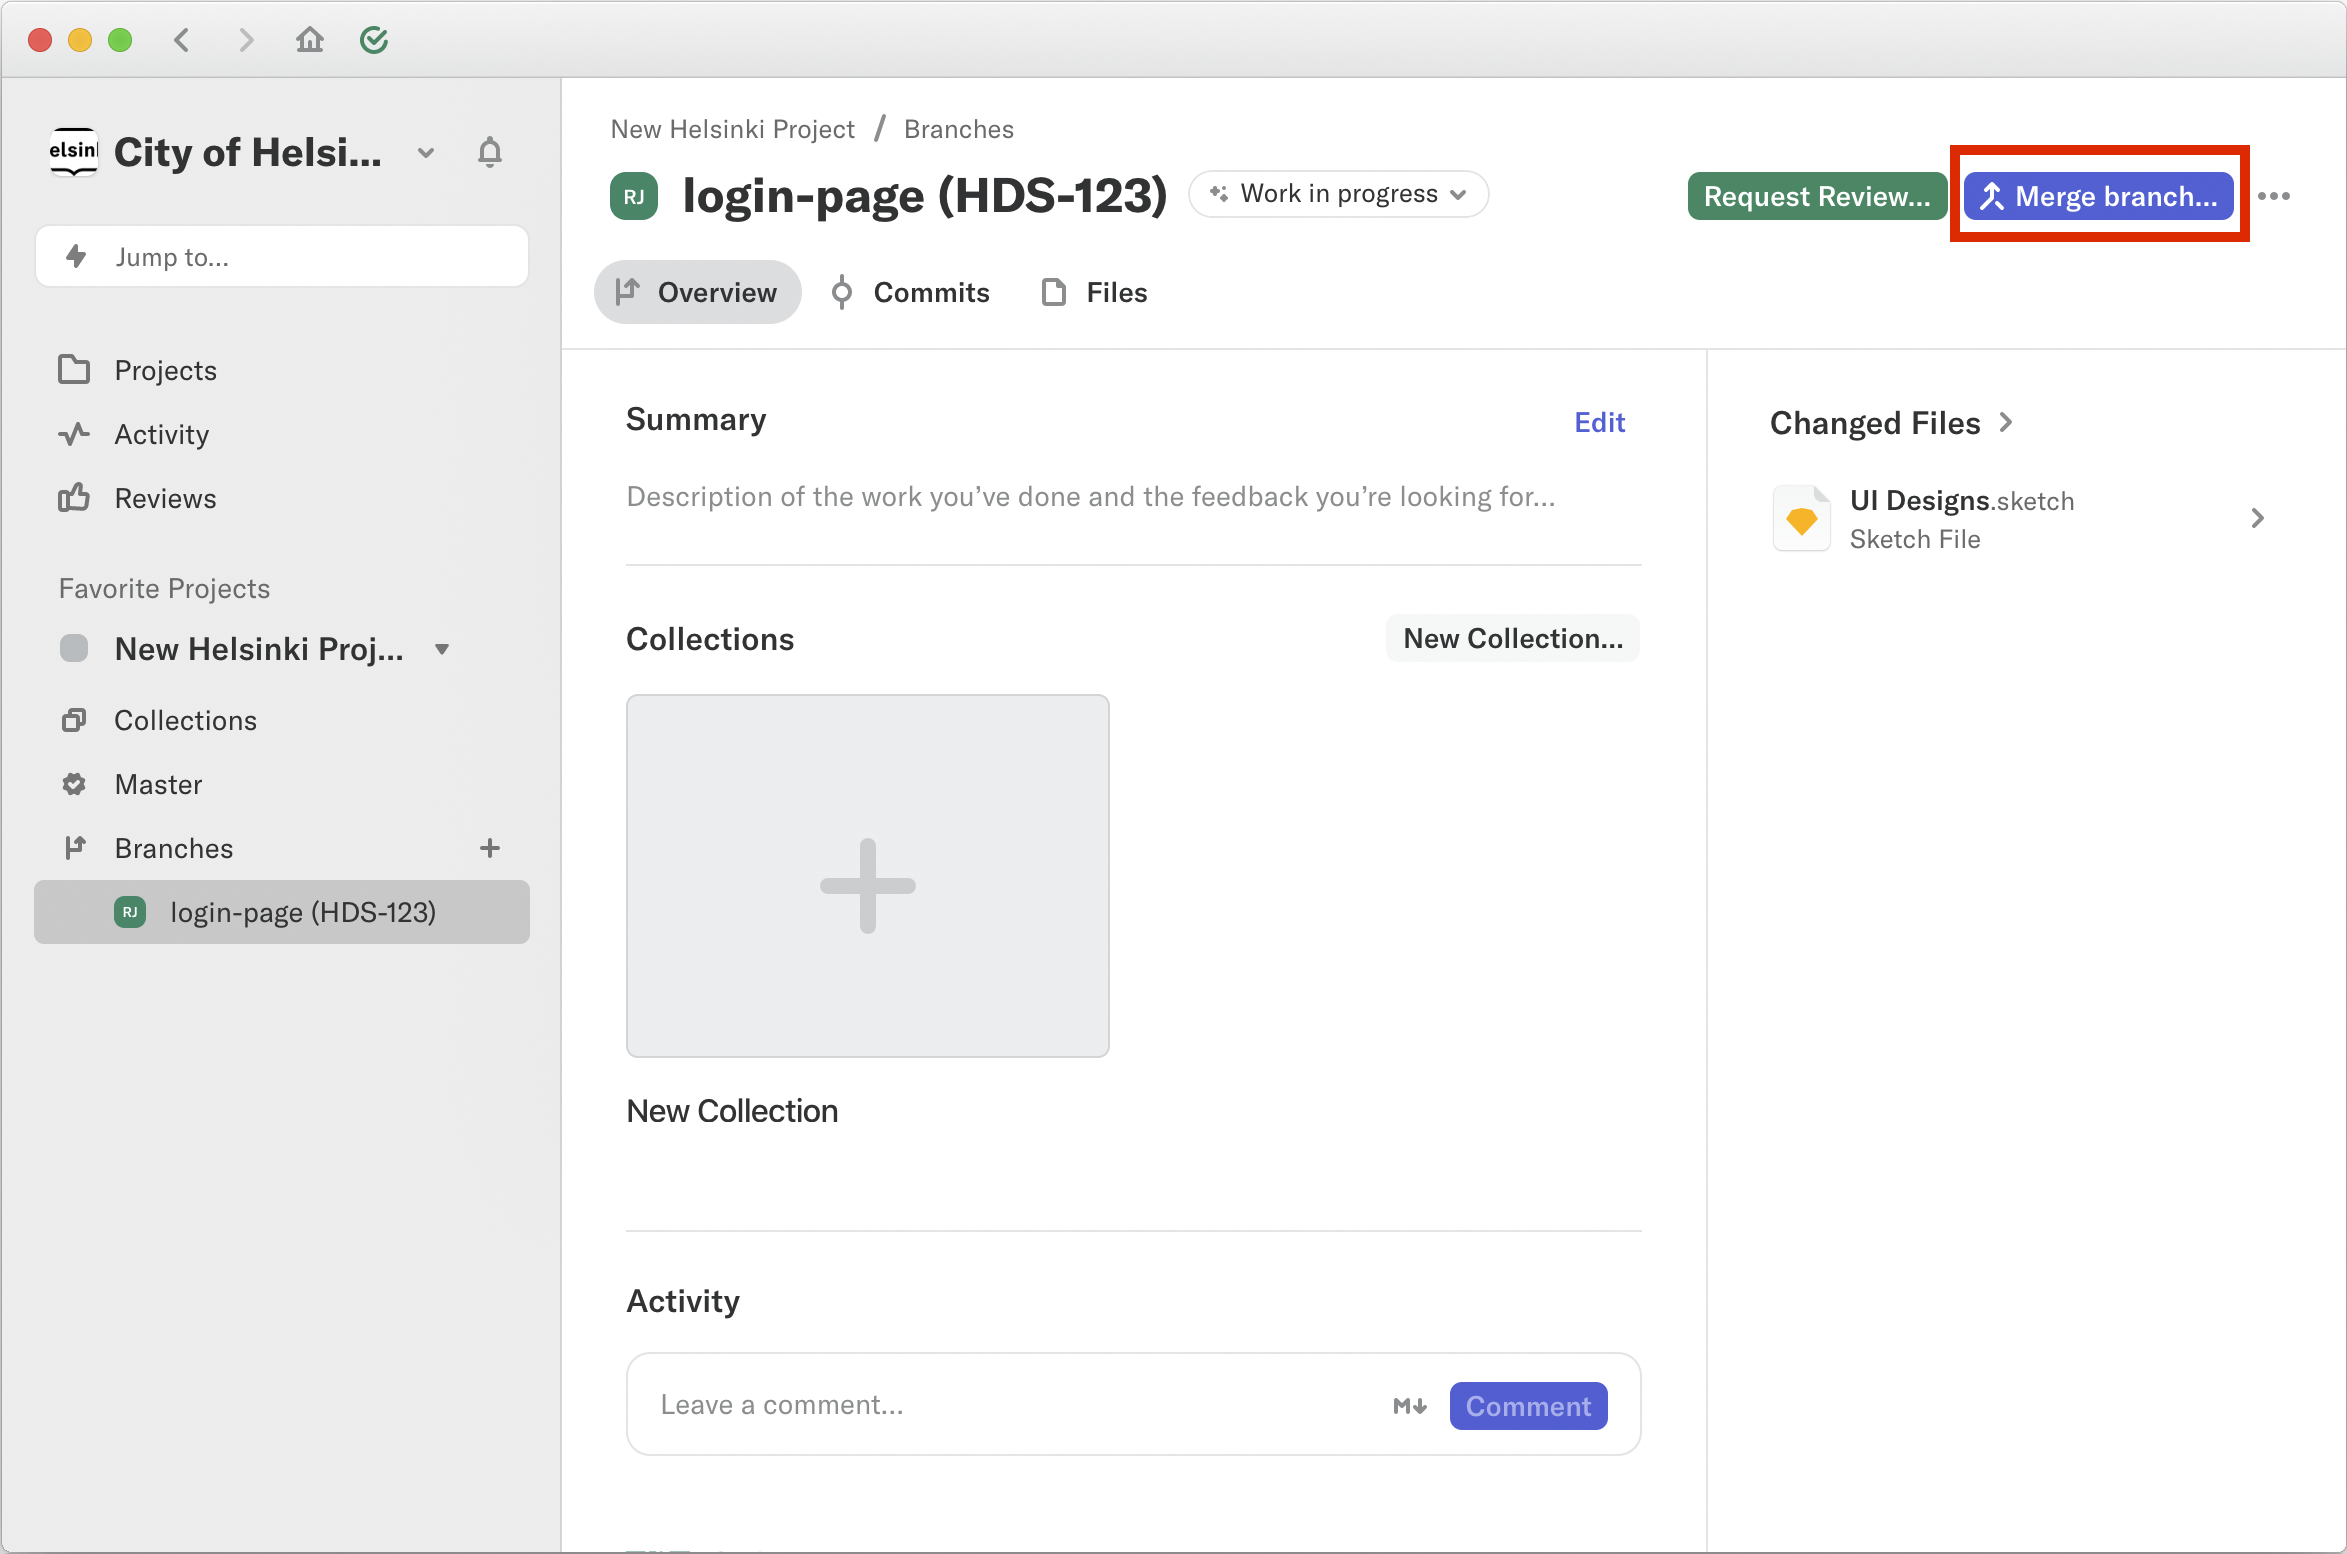
When you have made all changes to the branch, it is time to Merge it to the Master Branch. Merging means taking all of your new design changes to combining them with the designs in the Master Branch - creating a new source of truth for your project. To start the merge, press the "Merge branch..." (or "Update From Master") button at the top-right corner of the branch screen. You may skip the merge description and press the "Merge and Archive" button to continue.
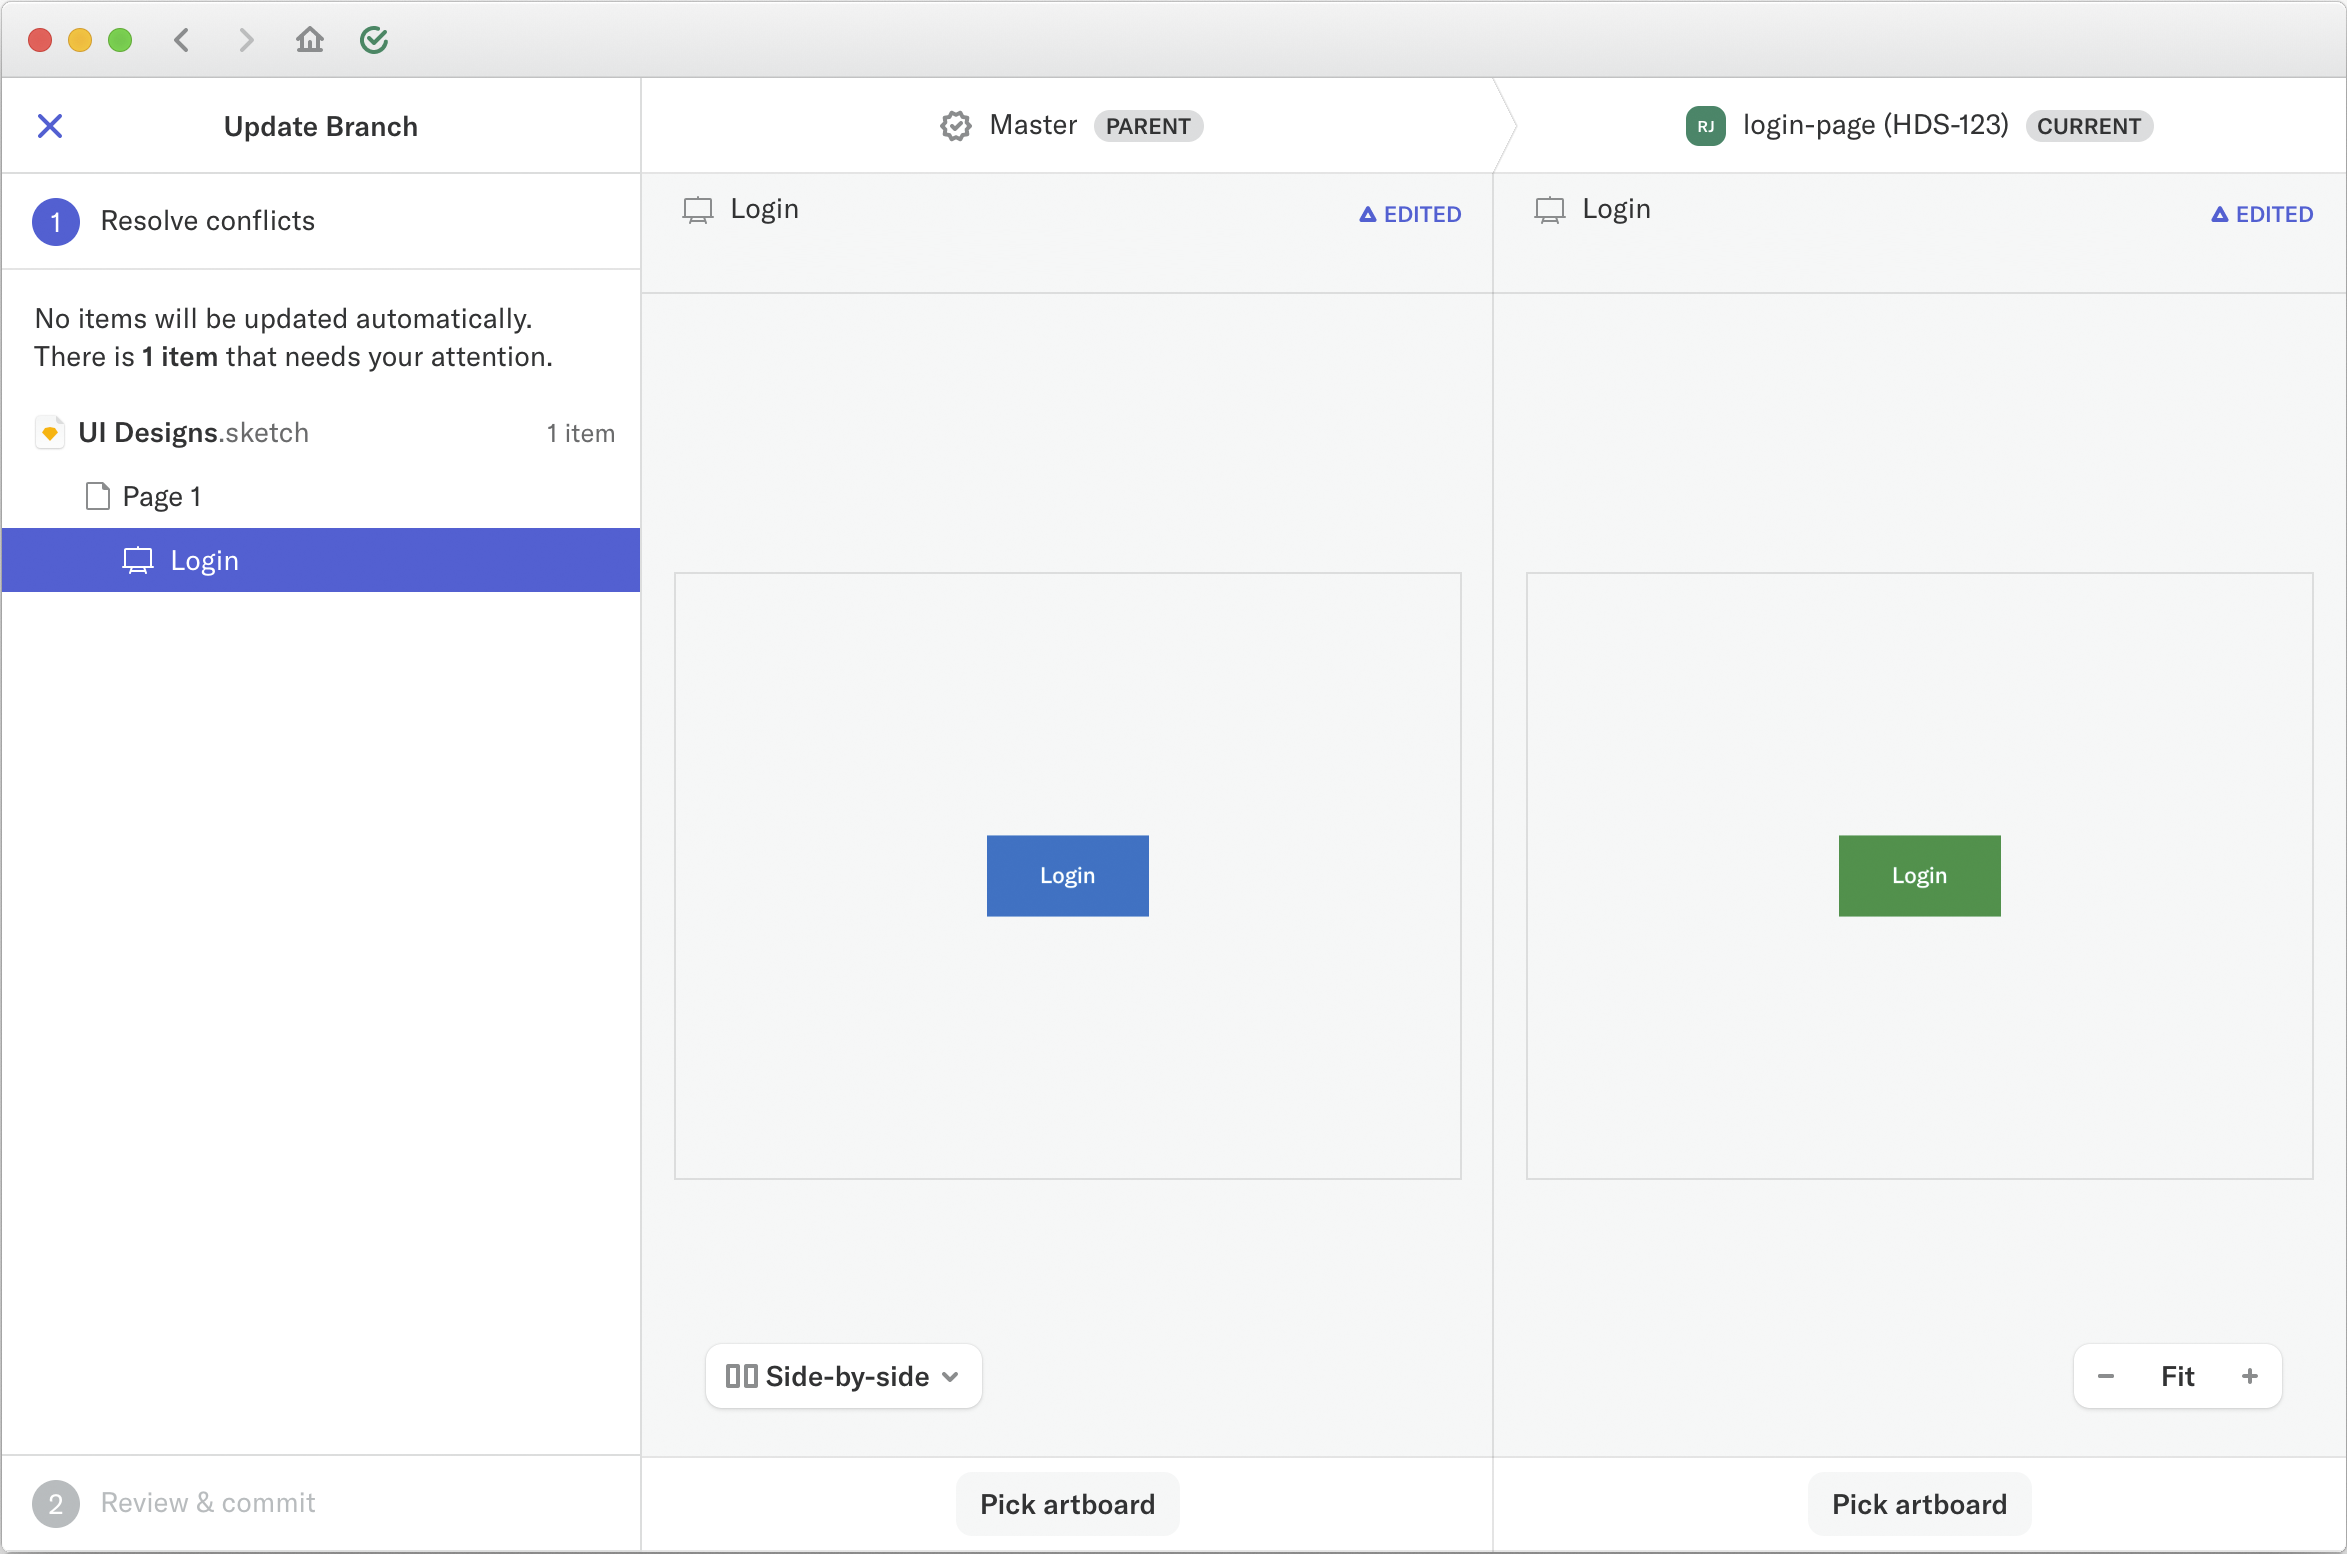
Next, Abstract checks if there are any Conflicts in your merge. Conflicts mean that someone else (another designer) has made changes to the Master branch that conflict with the changes you just made. Abstract provides an easy-to-use interface to select whether you want to use your changes or the changes in the Master Branch. Make the selection for each artboard/symbol to finalise the merge.
Congratulations, you have just made your first design change and committed it to the Master Branch!
Abstract resources
Abstract has plenty of features that were not covered in this short guide. The resources below help you to get started with more advanced features. You may also contact the HDS team for guidance if needed. See HDS Support page for more information.
